Most teams do not need a large AI gateway rollout on day one. They need a short path from “we have an account” to “we compared a few models on real work and know what to test next.”
This Flatkey integration starter is designed for that first session. It connects the essential pieces—API access, a first request, desktop tools, coding assistants, model comparison, pricing, and team handoff—without forcing you to adopt every workflow at once.
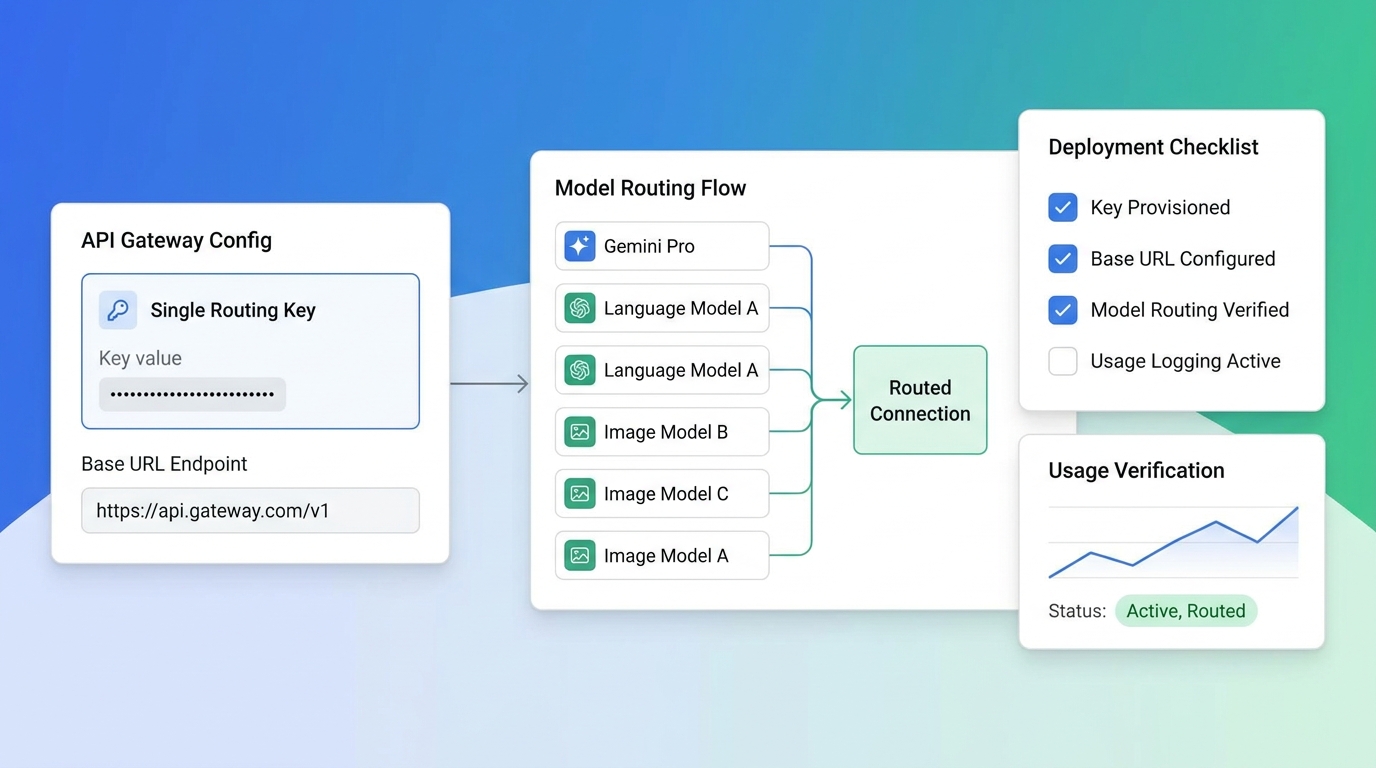
The operating idea is simple: start with one Flatkey API key and one OpenAI-compatible base URL, then choose the work surface that matches the person doing the evaluation.
https://router.flatkey.ai/v1
Developers can use an SDK or terminal. Prompt owners can start in Cherry Studio. Coding teams can add a Flatkey profile in CC Switch. Everyone can work from the same model shortlist and compare results before the team commits to a production route.
The Flatkey starter stack at a glance
Use this table to choose the smallest useful setup for your first test.
| Your immediate goal | Start here | What success looks like |
|---|---|---|
| Confirm the API works | Flatkey quickstart | One valid response appears in your application and usage logs |
| Compare prompts manually | Cherry Studio setup guide | The same prompt can be tested across a small model shortlist |
| Add Flatkey to a coding workflow | CC Switch setup guide | A local Flatkey profile can be selected without replacing every existing profile |
| Build a repeatable benchmark | Multi-model prompt testing workflow | Each model receives the same test cases and scoring rubric |
| Choose a production candidate | AI model evaluation checklist | Quality, latency, reliability, and effective cost are reviewed together |
| Estimate the operating fit | Flatkey pricing | Your shortlist reflects current model access and expected workload |
You do not need to complete every row. A solo evaluator may use the quickstart and Cherry Studio. An engineering team may go directly from the quickstart to an SDK test harness. A coding team may begin with CC Switch and add structured evaluation after it identifies promising models.
Step 1: Pick one real task, not a generic demo
The fastest onboarding session begins with a representative job. Avoid starting with a vague prompt such as “write something creative.” It is difficult to score and rarely resembles the work that will justify the integration.
Choose one task with a visible pass condition, for example:
- Extract five required fields from a support message.
- Return valid JSON that matches your application schema.
- Draft a reply that follows a specific policy and tone.
- Explain a code change without inventing files or functions.
- Call an approved tool with the correct arguments.
Prepare five to ten examples before comparing models. Include ordinary cases, one difficult case, and at least one case that should fail safely. This small set is enough to reveal obvious differences without turning the first session into a full evaluation program.
Keep the prompt, expected output shape, and scoring rules stable. The model should be the main variable.
Step 2: Make one API call through the quickstart
Follow the Flatkey quickstart to create an API key, point an OpenAI-compatible client at the Flatkey router, and make the first request.
Your first-call checklist is intentionally short:
- Store the key in an environment variable rather than source code.
- Set the base URL to
https://router.flatkey.ai/v1. - Choose a currently available model from the live Flatkey catalog or console.
- Send one representative prompt.
- Confirm that the response is parseable and the request appears in usage logs.
Do not add fallback routing, complex retries, or several tools before this request works. Those layers can hide whether the key, base URL, model selection, and request contract are correct.
Once one call succeeds, save the exact prompt, model identifier, request time, response, latency, and usage. That record becomes the baseline for the next model.
Step 3: Choose the right evaluation surface
The best starter integration depends on who is doing the work.
Cherry Studio for hands-on prompt comparison
Cherry Studio is useful when a product manager, prompt designer, marketer, researcher, or technical evaluator wants a graphical workspace for testing conversations and model behavior.
Use the Cherry Studio API setup guide to add the Flatkey endpoint and credential. Then create a small comparison routine:
- Paste the same system instructions and user input.
- Change only the model unless a model requires a documented parameter adjustment.
- Record whether the answer passes hard requirements.
- Score clarity, usefulness, and preference separately.
- Save failures as well as strong responses.
This is the quickest way to make model differences visible to non-developers. It is not a replacement for automated testing, but it can produce a focused shortlist before engineering builds a harness.
CC Switch for coding-assistant profiles
CC Switch is a practical starting point when the immediate use case is local coding-assistant configuration. Follow the CC Switch setup guide to create a Flatkey-backed profile and preserve the ability to move between approved configurations.
Evaluate coding models with repository-specific tasks rather than a generic coding puzzle. Ask each candidate to explain a real module, propose a focused patch, identify a failing test, or generate a migration plan. Review whether it respects file boundaries, follows instructions, and avoids unsupported claims about the codebase.
Keep your existing profile available until the new route has passed the tasks that matter to your team. A successful connection proves access; it does not prove that every model is appropriate for every repository or automation level.
An SDK harness for repeatable results
Use an SDK or script when you need reproducibility. One OpenAI-compatible client can submit the same test set to multiple model IDs while your evaluator stores responses in a consistent format.
The multi-model prompt testing workflow shows how to freeze the request contract, separate hard requirements from preferences, record latency and usage, and avoid changing several variables at once.
Start with two or three models. More candidates create more review work and often delay the decision without improving it.
Step 4: Score the result that reaches production
The cheapest request is not always the lowest-cost result. A response that requires manual correction, violates a schema, times out, or triggers repeated retries can cost more than a higher-priced model that succeeds on the first attempt.
Use four score groups:
| Score group | Questions to answer |
|---|---|
| Task success | Did the output satisfy every hard requirement? |
| Quality | Was it accurate, useful, concise, and appropriate for the audience? |
| Operations | Was latency acceptable, and did the request complete reliably? |
| Economics | What is the effective cost per accepted result, including retries and review? |
The AI model evaluation checklist provides a deeper workflow for weighted scoring, structured-output checks, rate-limit testing, canary rollout, and rollback criteria.
Before choosing finalists, review the current Flatkey pricing page. Model access and economics can change, so use the live page rather than copying old numbers into an evaluation spreadsheet. Estimate prompt tokens, completion tokens, request volume, expected retries, and any fallback traffic for the workload you actually plan to run.
Step 5: Turn a personal test into a team-ready path
A working personal integration is the beginning of adoption, not the end. Before the workflow becomes shared infrastructure, assign owners and add basic controls.
Use this handoff checklist:
- Access owner: Controls API key creation, storage, rotation, and revocation.
- Model owner: Maintains the approved model shortlist and task-level routing policy.
- Quality owner: Curates test cases, scoring rules, and regression thresholds.
- Operations owner: Reviews usage, errors, latency, quotas, and fallback behavior.
- Budget owner: Compares forecasted usage with actual spend and investigates variance.
If several teams or regions will share the gateway, continue with the AI gateway for teams guide. If finance or operations needs a repeatable review process, use the AI API spend management guide to connect usage visibility, quotas, recharge records, and monthly planning.
The goal is not to create a committee for a starter test. It is to make sure the path from experiment to production has named owners before the integration becomes difficult to unwind.
A 30-minute Flatkey integration starter plan
Here is a practical first-session schedule:
| Time | Action | Output |
|---|---|---|
| 0–5 minutes | Choose one real task and five examples | A small, representative test set |
| 5–10 minutes | Create a key and complete the quickstart | One logged API request |
| 10–15 minutes | Connect Cherry Studio, CC Switch, or an SDK | One evaluation surface ready |
| 15–25 minutes | Run two or three models on the same examples | Comparable responses and measurements |
| 25–30 minutes | Review pricing and choose the next test | A shortlist, owner, and follow-up action |
At the end of the session, you should be able to answer four questions:
- Does the Flatkey route work in our preferred tool or code path?
- Which model candidates pass the non-negotiable requirements?
- What evidence is still missing before production use?
- Who owns the next evaluation step?
That is enough progress for day one. You can add larger datasets, automated judges, fallback routing, and team controls after the starter stack has produced a trustworthy shortlist.
Start with the smallest path that can teach you something
Flatkey supports several adoption surfaces, but the shortest route is usually the best route: one key, one base URL, one representative task, and one evaluation surface.
Start with the quickstart. Add Cherry Studio for visual prompt testing, CC Switch for coding-assistant profiles, or an SDK harness for repeatable benchmarks. Then use current pricing and production-focused evaluation criteria to decide what deserves a larger rollout.
The result is a starter stack that is fast enough for a new evaluator and structured enough to hand off to engineering, operations, and finance when the test becomes real work.